Elekcis, the Assassin Walkthrough

Watercolor/Mixed Media

This walkthrough will show the process it took to create my painting, Elekcis, the Assassin from early 2005. I'm not saying that any of this is the way watercolors are supposed to be done; this is just my method. And all of my paintings use slightly different methods depending on what effects I'm trying to achieve but this is a basic example. I have grown and changed some techniques since this painting was done, but I still use many of them, and I hope that some will find it helpful.

Media Used:

  • Arches hotpress watercolor paper
  • Watercolors (Various brands): Payne's Gray, Charcoal Gray and Black
  • Black gouache (Windsor and Newton)
  • Prismacolor Pencils: Black and White
  • Derwent watercolor pencils: Gunmetal, black and white
  • Black ink
  • Dr. Ph. Martin's Bleedproof White (white gouache or acrylic will work too, it just needs to be opaque)

1. A Detailed Sketch: First I start out with the sketch. I use photo references to help with anatomy and to get the poses to look more natural. Obviously, you do not need to make your sketch as detailed as mine. Your sketching style may be very loose lines. I like to shade mine in and make them more detailed to help me visualize what the final painting will turn out like. It makes it easier for me to spot anatomy errors and plan out some of my values. I end up referring to the sketch much more during the painting process than the photo reference.

2. Linework: Next, I use graphite paper to transfer the basic outlines of the sketch onto the watercolor paper. The transferred lines actually are much lighter than pictured above. My scanner made them darker. You place a sheet of graphite paper between the sketch and the watercolor paper, and then trace over the lines of your sketch with either a pencil or a stylus. This step can also be done using a lightbox, but I unfortunately don't have one.

3. Start with the Background: I started out with the background because I know that her wings are going to be white and that I plan to go back later and paint them with white paint. You may, of course, use masking fluid to protect your white areas while you are painting darker areas, which I do only when absolutely necessary. If I can paint around it or go back later and paint over it, then I will. But that is just a personal preference, since I really dislike using masking fluid. I painted the wall using a salt wash method because I wanted it to had a stoney texture to it. I used payne's gray watercolor to do a wash all over the outside of the arch. You have to work pretty fast so that the wash is as uniform as possible and so that you can get the salt on before it dries. The trick is not to put the salt on when it is too wet either. When the wash is still shiney on the paper but there are no standing pools of water is the perfect time to sprinkle the salt over it. It won't work if it is too wet. Once you have the salt on, wait until it is completely dry and then brush it off.

4. Next, I painted the inside of the arch. For this I used black watercolor and applied 3 thin washes. Let each wash dry before starting the next. I added more water as I went up toward the upper left side to create a sort of shadowy effect. This can be tricky to do and keep the wash smooth. When adding more water, don't flood it onto the paper. This will make it run into the dark side and it will end up blotchy and not smooth. In some cases, this may be an effect that you are going for. But if you want it to turn out smooth, then try to work fast, keep the wash wet even as you are gradiating the color from dark to light. Just dilute your paint on your palette as you go, but use the about the same amount of water on your paper. Repeat this if needed to get it as dark as you want it, but again, let each dry first or you will chance the washes streaking or blotching.

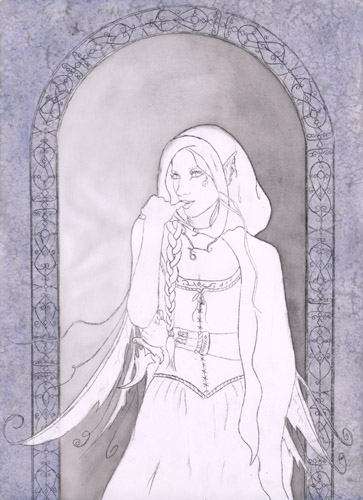
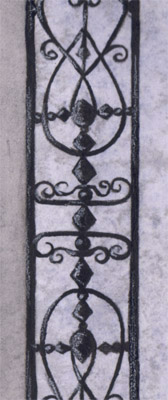
5. Next, I take a very small brush and use black ink to fill in the archway. This step could have been done first, before you painted in the background, but in that case, make sure that you have waterproof ink. After the inking is done, I used a white colored pencil and make some highlights.

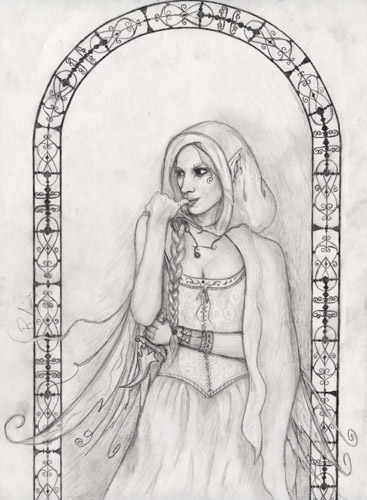
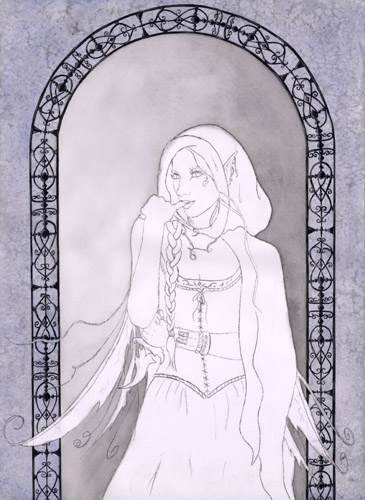
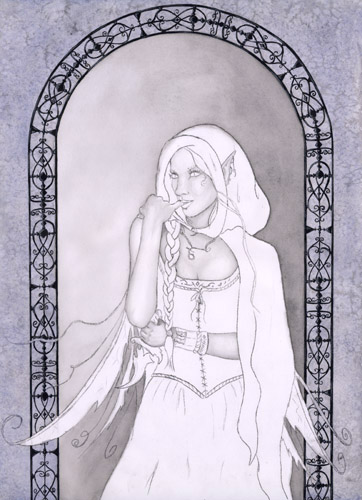
6. When I begin to work on the main figure of a painting, I always start with the skin and paint from light to dark. For example, I know that her skin is going to be very pale, and that much of her clothing is going to be much darker, mostly black, so I will start with her skin first. With watercolors you pretty much have to have some idea of your dark areas and your light areas before you start. You can always darken the paint up, but it is more difficult and sometimes impossible to make it lighter later. Painting the lighter areas first is also so that the dark areas don't bleed into light. If I already had her black cloak painted before I painted the skin, there is a good chance that the black from the cloak would bleed into her skin. Needless to say, that would be bad. So I start out with the skin here, shading with a thin wash of charcoal gray, leaving the white of the paper showing through for highlights.